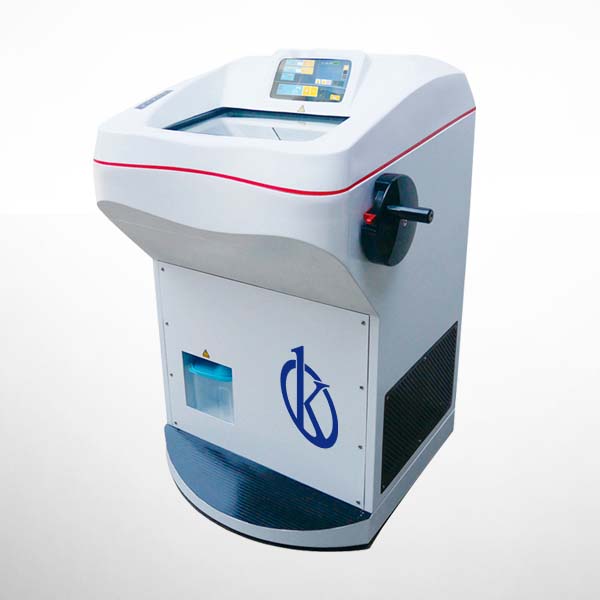
Installation and Startup Guide for the YR426-1 Cryostat Microtome
The YR426-1 Cryostat Microtome is an essential piece of medical equipment designed for the rapid analysis of pathological tissue sections. Used widely across hospitals, medical schools, forensic medicine, and animal research units, the YR426-1's effective installation and startup are crucial for optimal performance. This guide provides detailed steps to ensure a smooth setup and a successful first operation.
Understanding the YR426-1 Cryostat Microtome
The YR426-1 Cryostat consists of several key components. The top part includes a microcomputer control panel, which allows users to monitor temperature and operational status. The middle section houses a low-temperature freezer that facilitates the rapid freezing of biopsy tissues, essential for precise cutting. The lower unit contains the compressor cooling system, while the rear section comprises mechanical drive components.
Technical Specifications of the YR426-1
| Specification | Details |
|---|---|
| Model | YR426-1 |
| Chamber Temperature | 10 ℃ to -50 ℃ |
| Freezing Shelf Temperature | 0 ℃ to -50 ℃ |
| Sample Holder Temperature Control Range | 10 ℃ to -50 ℃ |
| Additional Semiconductor Cooling in Freezer | -60 ℃ |
| Number of Freezing Stations | 36 pieces |
| Maximum Sample Size | 55 mm × 80 mm |
| Vertical Stroke | 65 mm |
| Horizontal Stroke | 22 mm |
| Retract of Sample | 0 to 100 μm Adjustable |
| Net Weight | 135 KG |
Unboxing and Initial Setup
Upon receiving the YR426-1 Cryostat Microtome, the first step is unboxing. Check the contents against the checklist provided in the manual. Ensure all components are present, including the control panel, freezing units, and necessary accessories.
Next, confirm that you have a suitable location for installation. The area should be level and free from vibrations. Consider factors such as ventilation and access to power sources. It is advisable to have a dedicated circuit to prevent overloads during operation.
Anchoring and Leveling the Equipment
After confirming the site preparation, anchor the YR426-1 to the floor if necessary, using the appropriate hardware. Level the unit by adjusting the feet to ensure stability and accuracy during operation. This step is critical as improper leveling can lead to cutting inaccuracies.
Power-Up Sequence and Calibration
Once the unit is secured and leveled, proceed to power it up. Follow the sequence in the user manual to ensure all systems are initialized correctly. Calibration is essential to achieve the desired cutting precision. Set the temperature for the freezing shelf, and allow the device to stabilize before performing any cuts.
Common Mistakes During Setup
There are several common pitfalls operators may encounter during the setup of the YR426-1. Failing to level the unit properly can lead to uneven sectioning. Not allowing the freezing chamber to reach optimal temperature before use can also result in subpar sample preservation. Always consult the manual for detailed instructions and double-check each setup step.
Frequently Asked Questions
What should I check for during the unboxing of the YR426-1?
Ensure that all components listed in the checklist are present and undamaged. Check for the control panel, freezing unit, and accessories.
How do I calibrate the temperature settings on the YR426-1?
Follow the calibration instructions in the manual, setting the freezing shelf temperature and allowing the system to stabilize before beginning operations.
What are the most common setup errors to avoid with the YR426-1?
Common errors include improper leveling of the unit and not allowing sufficient time for the freezing chamber to reach the desired temperature.
How long does it take for the YR426-1 to reach optimal cutting temperature?
The YR426-1 typically reaches optimal cutting temperature within 15 minutes of calibration.
What maintenance is required for the YR426-1 Cryostat Microtome?
Regular maintenance includes cleaning and checking the temperature sensors and ensuring that the freezing mechanism is functioning correctly.
Can the YR426-1 be used in various laboratory settings?
Yes, the YR426-1 is versatile and can be utilized in clinical, research, and educational settings, depending on specific protocols.
How do I troubleshoot common errors on the YR426-1?
Refer to the troubleshooting section of the manual, which outlines common symptoms, possible causes, and solutions, ensuring effective operation.
For any specialized needs, we invite you to request a quote on Kalstein Plus. Explore our offerings and see how we can support your laboratory requirements.
If you are looking for a fusion of innovation and quality, you have come to the right place. At Kalstein, we offer you the luxury of exploring our exclusive catalog of laboratory equipment. We manufacture every device to the highest standards of excellence. Our intuitive and seamless online purchasing channels are designed for your convenience, securing the most competitive prices. Hesitate no longer — we bring science to life, it is time to become part of our community.