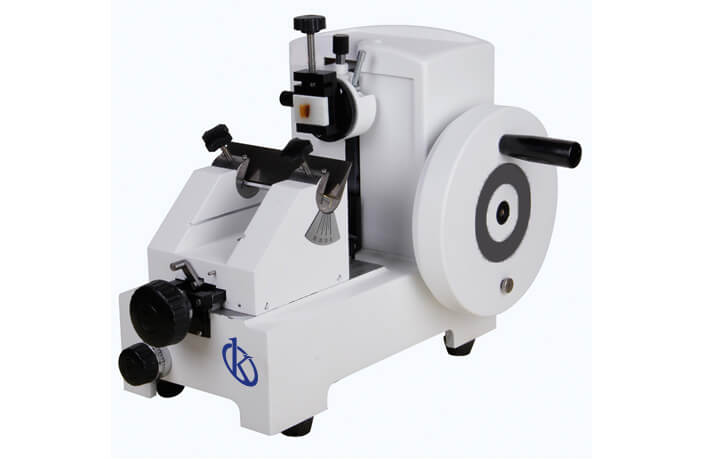
Installation and Commissioning Guide for the YR421 Microtome
The YR421 Microtome is an advanced manual rotary microtome that integrates cutting-edge technology and design. This guide focuses on the installation and commissioning processes, which are crucial for ensuring the unit operates to its full potential. With precise roller guide rails and a robust design, the YR421 is ideal for histological and pathological applications, producing high-quality continuous sections. This guide serves as a detailed roadmap for laboratory operators to set up the YR421 efficiently.
Unboxing Checklist
Before installation, it is vital to unbox the YR421 properly to ensure all components are intact. The unboxing checklist includes:
- YR421 Microtome unit
- Power cord
- Blade holder
- Operating manual
- Calibration tools
- Spare parts kit
- Documentation and warranty card
Inspect each item and report any discrepancies to the supplier immediately.
Site Preparation Requirements
Preparing the site is crucial for the successful installation of the YR421 Microtome. Consider the following requirements:
| Requirement | Specification |
|---|---|
| Temperature Range | 18°C to 25°C |
| Humidity | 30% to 70% (non-condensing) |
| Power Supply | 220V, 50Hz |
| Vibration | Minimal, avoid high vibration areas |
| Clearance Space | At least 60 cm around the unit |
Leveling the YR421 Microtome
Once the unit is in place, leveling is necessary to ensure precision cutting. Use a spirit level to check that the microtome is perfectly horizontal. Adjust the leveling feet if necessary, ensuring stability and preventing any movement during operation.
Power-Up Sequence
To power up the YR421 Microtome, follow this sequence:
- Connect the power cord to the unit and wall socket.
- Turn the main power switch to the 'ON' position.
- Allow the unit to initialize; indicators will light up on the control panel.
- Perform a self-check as per the manual instructions.
First-Run Calibration
Calibration is crucial for ensuring accurate slice thickness. Here’s how to perform the first-run calibration:
- Use the provided calibration tool to adjust the thickness setting.
- Set the thickness to the minimum (1 μm) and perform a test cut.
- Measure the thickness of the section using a calibrated micrometer.
- Adjust the setting based on the measurement until accurate.
Common Setup Mistakes
Operators should be aware of common mistakes during the installation process:
- Improper leveling can lead to inconsistent section thickness.
- Incorrect power supply can damage the unit.
- Failing to calibrate before the first use can affect results.
- Not securing the blade holder can lead to accidents.
Technical Specifications of YR421
| Specification | Details |
|---|---|
| Model | YR421 |
| Cutting Thickness Range | 0–500 μm |
| Minimum Cutting Thickness | 1 μm |
| Sample Holder Rotation | 360 degrees |
| Sample Orientation | XY-8° |
| Horizontal Sample Feed | 28 mm |
| Vertical Sample Stroke | 60 mm |
| Blade Holder Base Movement Range | 0-50 mm (fore-aft) |
| Maximum Sample Size | 50 × 60 mm |
| Precision Error | ±5% |
| Dimensions | 420×330×330 mm |
| Net Weight | 19 kg |
Frequently Asked Questions
What is the proper way to level the YR421 Microtome?
Leveling the YR421 Microtome requires using a spirit level to check its horizontal position. Adjust the leveling feet as needed to achieve stability.
How do I perform the first calibration on the YR421?
To calibrate the YR421 for the first time, set the cutting thickness to 1 μm, perform a test cut, and measure the thickness with a micrometer. Adjust the settings accordingly until the measurements match.
What are the common mistakes during the installation of the YR421?
Common mistakes include improper leveling, incorrect power supply connection, failure to calibrate the unit before first use, and not securing the blade holder correctly.
Can the YR421 be used in different laboratory environments?
Yes, the YR421 Microtome is versatile and can be effectively used in various laboratory environments, including clinical, industrial, and educational settings.
What maintenance is required for the YR421 Microtome?
The YR421 requires regular cleaning of the cutting surfaces, periodic calibration checks, and inspection of the blade holder and cutting blades for wear and tear.
Is there a warranty for the YR421 Microtome?
Yes, the YR421 comes with a warranty that covers manufacturing defects and includes terms for service intervals. Consult the warranty documentation included with the unit for specifics.
How can I request a quote for the YR421 Microtome?
You can request a quote for the YR421 Microtome by contacting us directly through our inquiry channels available on our website.
If you are looking for a fusion of innovation and quality, you have come to the right place. At Kalstein, we offer you the luxury of exploring our exclusive catalog of laboratory equipment. We manufacture every device to the highest standards of excellence. Our intuitive and seamless online purchasing channels are designed for your convenience, securing the most competitive prices. Hesitate no longer — we bring science to life, it is time to become part of our community.