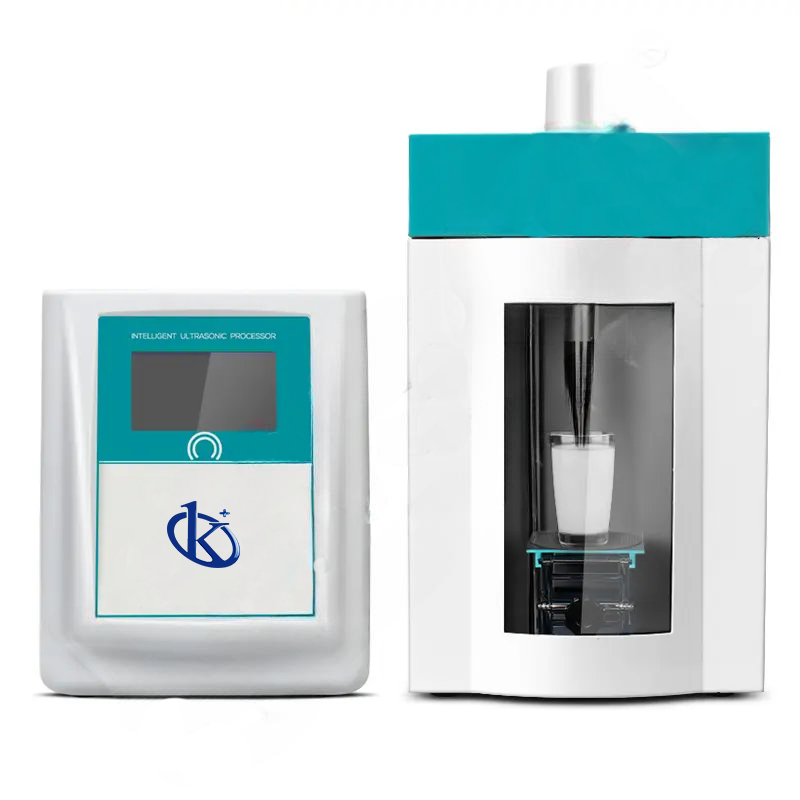
Installation and Commissioning Guide for the YR05017 Ultrasonic Homogenizer
The YR05017 Ultrasonic Homogenizer is a cutting-edge piece of laboratory equipment designed for efficient homogenization of samples. This guide will walk you through the essential steps for installation and commissioning, ensuring that you get the most out of your instrument from the very start.
Overview of the YR05017 Ultrasonic Homogenizer
The YR05017 model features advanced technology, including a single-chip design and a 4.3-inch optional TFT touchscreen. It is equipped with PID control, adjustable ultrasonic time, and power ranging from 1% to 100%. Additionally, it offers automatic temperature detection and overload protection, making it a reliable choice for laboratory applications.
Technical Specifications of YR05017
| Specification | Details |
|---|---|
| Model | YR05017 |
| Power (Continuous) | 10 – 650 W |
| Mixing Capacity | 0.1 – 500 ml |
| Optional Probe Diameter | Ø 2/3/10/12 mm |
| Ultrasonic Time | 0.1 – 99.9 s |
| Temperature Control Range | 0-100 °C (customizable) |
| Alarm Functions | Time, temperature, overload, no load |
| Display Mode | Touchscreen |
| Voltage | 220 V / 110 V / 50 Hz / 60 Hz |
| External Dimensions | 410 x 225 x 290 mm |
Unboxing and Initial Setup
Upon receiving the YR05017, you should carefully unbox the unit and check for any shipping damage. The unboxing checklist includes:
- YR05017 Ultrasonic Homogenizer unit
- Power cable
- Probe (if included)
- User manual
- Calibration certificate
Ensure all components are present and in good condition before proceeding with installation.
Installation Steps
The installation of YR05017 should be carried out in a clean, dry laboratory environment. Follow these steps:
- Positioning: Place the unit on a stable, level surface to avoid vibrations during operation.
- Power Connection: Ensure that the power outlet meets the voltage requirements (220 V or 110 V) before plugging in the device.
- Probe Installation: Attach the ultrasonic probe securely according to the user manual, ensuring that it is positioned correctly for effective homogenization.
- First Run Calibration: Perform the initial calibration as per the user manual to ensure accuracy during operation.
Common Installation Mistakes
During the installation process, several common mistakes can occur. Here are the pitfalls to watch out for:
- Improper probe attachment leading to inefficient sample processing.
- Placement on an uneven surface causing operational vibrations.
- Failure to calibrate the device before the first use.
Validation of First Measurement
To ensure that the YR05017 is functioning correctly after installation, you should validate your first measurement:
- Power on the device and select appropriate settings based on your sample type.
- Run a test sample and monitor the readings on the touch display.
- Compare the output with expected results to confirm proper operation.
Frequently Asked Questions
What are the key features of the YR05017 Ultrasonic Homogenizer?
The YR05017 features a touchscreen interface, PID control, adjustable power settings, temperature detection, and multiple alarm functions for enhanced safety and usability.
How do I maintain the YR05017 Ultrasonic Homogenizer?
Regular cleaning of the probe, calibration checks, and ensuring that the device is stored in a dust-free environment are critical for maintaining optimal performance of the YR05017.
What should I do if the YR05017 does not power on?
Check the power connection, ensure the outlet is functional, and verify that there are no internal safety triggers activated. Refer to the troubleshooting guide in the user manual for further diagnosis.
Can I customize the settings on the YR05017 Ultrasonic Homogenizer?
Yes, the device allows for customization of ultrasonic time and power levels according to the sample requirements, enabling tailored operation for specific applications.
What is the warranty period for the YR05017?
The standard warranty for the YR05017 is typically one year, covering manufacturing defects. Please check the warranty terms in your purchase agreement for specifics.
Are there any specific accessories recommended for the YR05017?
Yes, optional probes of various diameters and the data printing module are recommended accessories to enhance the YR05017’s functionality and versatility in laboratory settings.
How do I contact support for the YR05017?
For technical support, please refer to the contact details provided in the user manual or on the manufacturer’s official communication channels.
For a tailored quote on your YR05017 Ultrasonic Homogenizer, please reach out to us to ensure you get the best deal for your laboratory needs.
If you are looking for a fusion of innovation and quality, you have come to the right place. At Kalstein, we offer you the luxury of exploring our exclusive catalog of laboratory equipment. We manufacture every device to the highest standards of excellence. Our intuitive and seamless online purchasing channels are designed for your convenience, securing the most competitive prices. Hesitate no longer — we bring science to life, it is time to become part of our community.