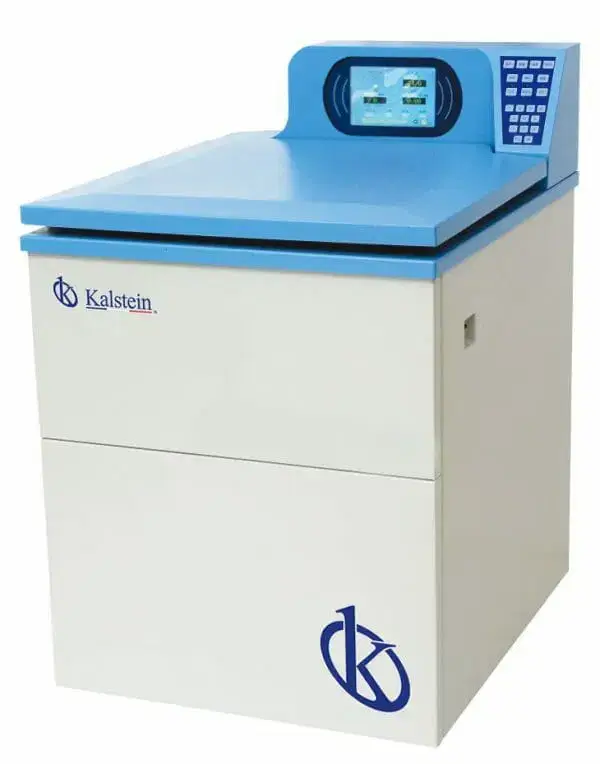
Installation and Commissioning Guide for the YR0111-4-3 Centrifuge
The YR0111-4-3 centrifuge is a crucial piece of equipment for laboratories requiring precise separation of samples. This guide provides a thorough overview of the installation and commissioning process, covering all necessary steps to ensure optimal functionality and longevity.
Overview of the YR0111-4-3 Centrifuge
The YR0111-4-3 centrifuge is designed for various laboratory applications, offering reliability and efficiency. It features a maximum capacity of 50ml and is equipped with an angle rotor, making it suitable for a wide range of sample types.
Technical Specifications
| Model | Brand | Category | Price (USD) | Gross Weight (kg) |
|---|---|---|---|---|
| YR0111-4-3 | Kalstein | Centrifuges | 619.00 | 7 |
Unboxing Checklist
When unpacking the YR0111-4-3 centrifuge, ensure that you have all components included:
- YR0111-4-3 Centrifuge Unit
- Angle Rotor
- Power Cord
- User Manual
- Calibration Weight (if applicable)
- Warranty Registration Card
Installation Steps
The installation process for the YR0111-4-3 centrifuge involves several key steps:
1. Selecting the Location
Choose a stable and level surface to place the centrifuge. Ensure that the area is free from vibrations and has adequate ventilation.
2. Anchoring the Centrifuge
Once the ideal location is found, secure the centrifuge using appropriate anchors to prevent movement during operation.
3. Leveling the Unit
Use a leveling tool to ensure that the centrifuge is perfectly level. Adjust the feet of the unit as necessary.
Power-Up Sequence
After ensuring a proper setup, follow these steps to power up the centrifuge:
- Connect the power cord to a properly grounded outlet.
- Press the power button to turn on the centrifuge.
- Wait for the self-diagnostic test to complete.
First-Run Calibration
Upon initial power-up, it is essential to perform a calibration to ensure accurate results:
- Access the calibration settings via the user interface.
- Follow the prompts to input the required parameters.
- Run a test cycle with calibration weights.
Common Setup Mistakes
To avoid common pitfalls during installation, consider these tips:
- Ensure the centrifuge is on a level surface to prevent imbalance.
- Verify that all connections are secure before powering on.
- Calibrate based on the specific sample types you will be using.
Frequently Asked Questions
What is the maximum capacity of the YR0111-4-3 centrifuge?
The YR0111-4-3 centrifuge can handle a maximum capacity of 50ml per tube, making it versatile for a variety of laboratory applications.
How do I ensure the centrifuge is level during installation?
Use a bubble level tool to check that the centrifuge is level both front to back and side to side. Adjust the feet as needed to achieve level placement.
What should I do if the centrifuge does not power on?
First, check the power connection and ensure that the outlet is functioning. If the problem persists, refer to the troubleshooting section of the user manual.
Can I use the YR0111-4-3 for different types of samples?
Yes, the YR0111-4-3 is designed to accommodate various sample types, including biological fluids, cell cultures, and more. Always refer to the user manual for specific guidelines.
What maintenance is required for the YR0111-4-3 centrifuge?
Routine maintenance includes cleaning the rotor and chamber after use, checking for wear and tear, and performing regular calibrations as outlined in the user manual.
How do I register the warranty for my YR0111-4-3 centrifuge?
Complete and submit the warranty registration card included in the packaging, or visit the manufacturer's website for online registration options.
Conclusion
Following this installation and commissioning guide will ensure that your YR0111-4-3 centrifuge operates effectively and reliably in your laboratory settings. By adhering to proper installation procedures and performing regular maintenance, you can enhance the lifespan and performance of your equipment.
If you are looking for a fusion of innovation and quality, you have come to the right place. At Kalstein, we offer you the luxury of exploring our exclusive catalog of laboratory equipment. We manufacture every device to the highest standards of excellence. Our intuitive and seamless online purchasing channels are designed for your convenience, securing the most competitive prices. Hesitate no longer — we bring science to life, it is time to become part of our community.