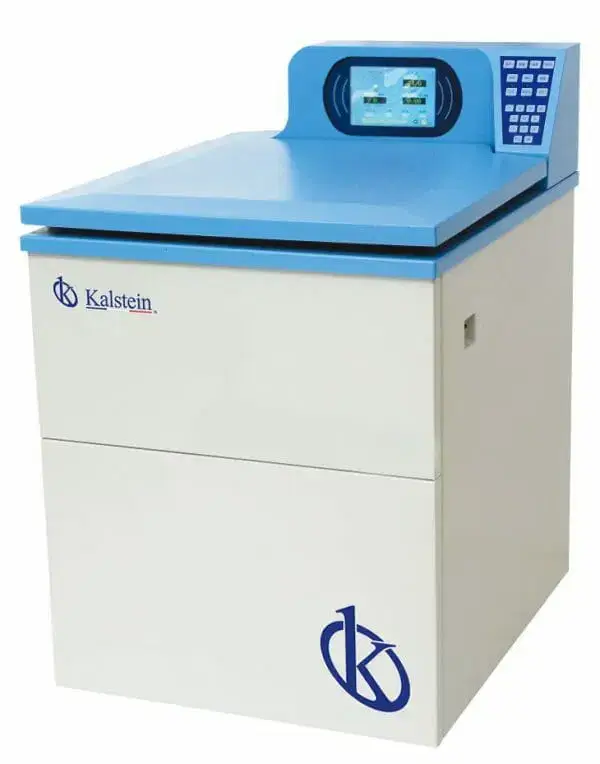
Installation and Commissioning Guide for the YR0111-4-0 Centrifuge
The YR0111-4-0 centrifuge is a high-speed refrigerated centrifuge designed to meet the needs of various laboratory applications. This guide will cover all aspects related to the installation and commissioning of this model. Proper installation and setup are critical for ensuring the functionality and longevity of the centrifuge.
Understanding the YR0111-4-0 Centrifuge
Before beginning the installation process, it’s crucial to understand the features and specifications of the YR0111-4-0. This model boasts a maximum speed of 21,000 rpm and a maximum relative centrifugal force (RCF) of 50,400 g. With a capacity to hold up to four 500 ml containers, it is ideal for a variety of centrifugation tasks.
Technical Specifications of the YR0111-4-0
| Specification | Details |
|---|---|
| Model | YR0111-4 |
| Maximum Speed | 21,000 rpm |
| Maximum RCF | 50,400 g |
| Maximum Capacity | 500 ml x 4 |
| Speed Accuracy | ±50 rpm |
| Time Parameters | 1 min ~ 99 h 59 min |
| Temperature Setting | -20 ~ +40°C |
| Temperature Accuracy | ±1 °C |
| Compressor Unit | French compression unit Tecumseh, R404a |
| Noise | <65db(A) |
| Power Source | 110V/60Hz, 220V/50Hz |
| Dimensions (L x W x H) | 710 x 840 x 1140 mm |
| Package Size (L x W x H) | 890 x 960 x 1400 mm |
| Net Weight | 280 Kg |
Unboxing and Initial Setup
Upon receiving the YR0111-4-0 centrifuge, begin with the unboxing process. Ensure you have the following items:
- YR0111-4-0 Centrifuge Unit
- Power Cable
- Operating Manual
- Accessories (rotors, lids, etc.)
- Calibration Weights (if applicable)
Inspect the unit for any visible damage and verify the contents against the packing list. Once confirmed, proceed to the installation location, ensuring that it meets the environmental requirements for operation.
Choosing the Installation Location
The installation site for the YR0111-4-0 should be clean, level, and well-ventilated. Consider the following:
- Temperature Range: The ambient temperature should be maintained within the specified range of -20 ~ +40°C.
- Power Supply: Ensure a stable power supply of 110V/60Hz or 220V/50Hz is available.
- Space: Ensure there is adequate space for ventilation and operation, with at least 10-15 cm clearance around all sides.
- Vibration: The centrifuge should be placed on a stable surface to minimize vibrations during operation.
Anchoring and Leveling
Once the location is selected, anchor the centrifuge to prevent movement. Use adjustable leveling feet to ensure the unit is perfectly level. This helps to maintain accurate performance during operation and minimizes wear on components.
Power-Up Sequence
After leveling the centrifuge, connect the power supply and follow the power-up sequence:
- Ensure the power switch is turned off.
- Connect the power cable to the appropriate outlet.
- Turn on the power switch.
- Allow the unit to initialize; check the display for any error codes.
If all systems are functioning properly, you are ready to proceed with the first-run calibration.
First-Run Calibration
Calibration is critical to ensure the accuracy of the centrifuge's performance. Begin calibration by following these steps:
- Load the centrifuge with calibration weights equal to the maximum capacity.
- Select the desired speed and run time on the control panel.
- Start the centrifuge and monitor for any unusual noises or vibrations.
- After the run, check the accuracy of the speed and compare it to the expected values.
Document the results to validate the calibration.
Common Setup Mistakes
When setting up the YR0111-4-0, avoid these common mistakes:
- Failing to level the unit properly.
- Ignoring power supply requirements.
- Overloading the centrifuge beyond its maximum capacity.
- Neglecting to run a calibration check prior to use.
Frequently Asked Questions
What should I do if the YR0111-4-0 centrifuge does not power on?
Check the power connections, ensuring the unit is plugged in and the power switch is on. If the unit still does not power on, inspect the fuse or circuit breaker.
How can I calibrate the YR0111-4-0 centrifuge?
Calibration is performed by loading calibration weights and running the centrifuge at specified settings. Measure the speed and compare it to expected values to ensure accuracy.
What is the maximum capacity of the YR0111-4-0 centrifuge?
The maximum capacity of the YR0111-4-0 is four 500 ml containers, totaling 2000 ml.
How do I maintain the YR0111-4-0 centrifuge?
Regular maintenance includes cleaning, checking for wear on rotors, and ensuring the cooling system is functioning properly. Follow the manufacturer's recommendations for service intervals.
What safety measures should be taken when using the YR0111-4-0 centrifuge?
Always ensure the lid is closed and locked during operation, do not exceed the maximum load, and be vigilant for any unusual sounds or vibrations during use.
How can I request a quote for the YR0111-4-0 centrifuge?
You can easily request a quote by reaching out to our sales team through our official contact channels.
Conclusion
If you are looking for a fusion of innovation and quality, you have come to the right place. At Kalstein, we offer you the luxury of exploring our exclusive catalog of laboratory equipment. We manufacture every device to the highest standards of excellence. Our intuitive and seamless online purchasing channels are designed for your convenience, securing the most competitive prices. Hesitate no longer — we bring science to life, it is time to become part of our community.